This guide connects OBS Studio to ClipAd Live. It takes about 10 minutes the first time. After that, going live takes about one minute.
Before you start
- You need a ClipAd Studio login with Editor, Manager or Admin access.
- You need OBS Studio. It is free. Download it from obsproject.com. The screens in this guide are from OBS Studio 32 on a Mac. On Windows, the same options are in the same places.
- You need a steady internet connection. A cable (Ethernet) is better than Wi-Fi.
- Check your upload speed at speed.cloudflare.com. Your stream cannot be faster than your upload speed. See Best settings and how to fix a poor stream to pick the right settings for your speed.
- Have your camera, capture card or video file ready in OBS.
Step 1: Get your connection details from ClipAd
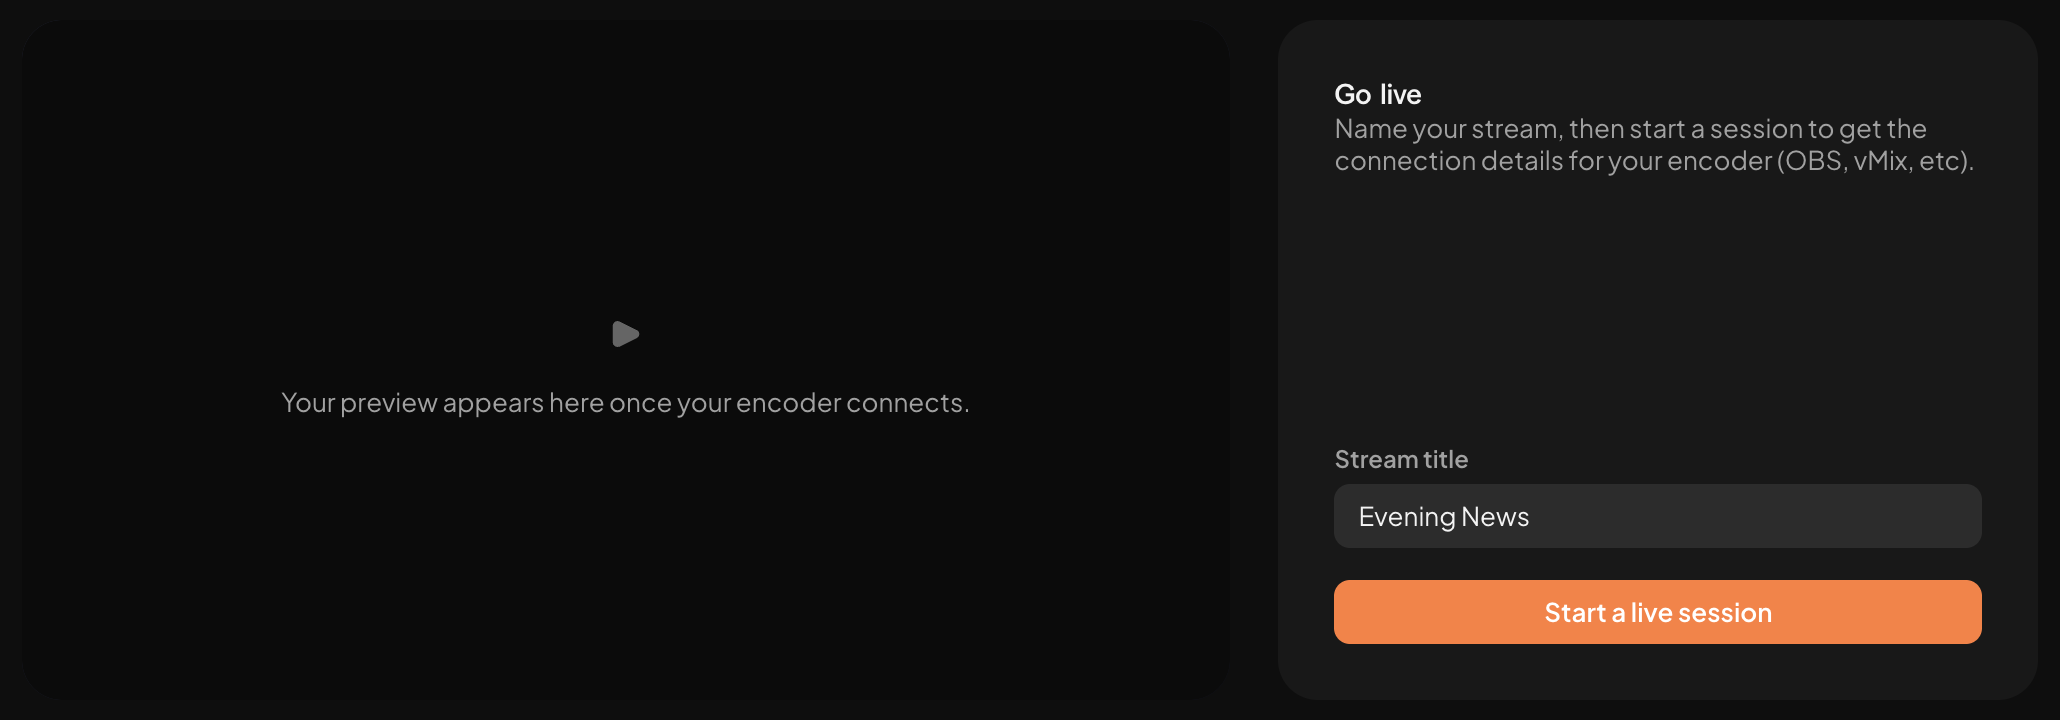
- In ClipAd Studio, click Live in the left menu. It opens in a new tab.
- Type a name for your stream. For example, "Evening News".
- Click Start a live session.
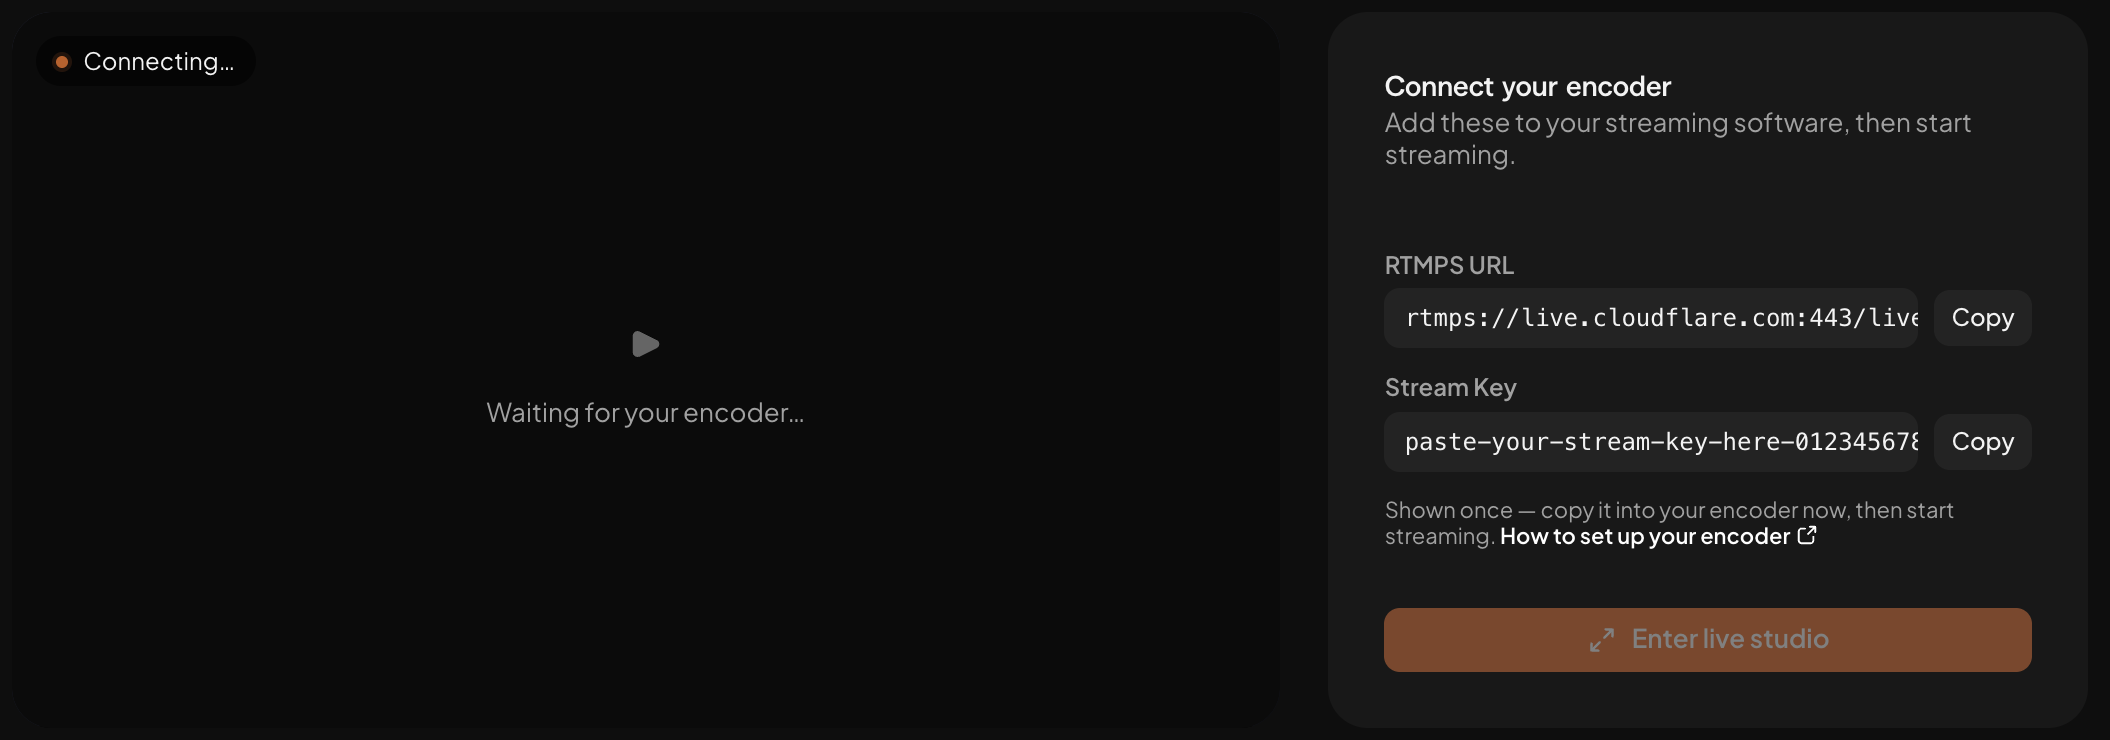
- ClipAd shows two things: the RTMPS URL and the Stream Key. Click Copy next to each one and keep them ready.
Step 2: Add the URL and key to OBS
- Open OBS Studio.
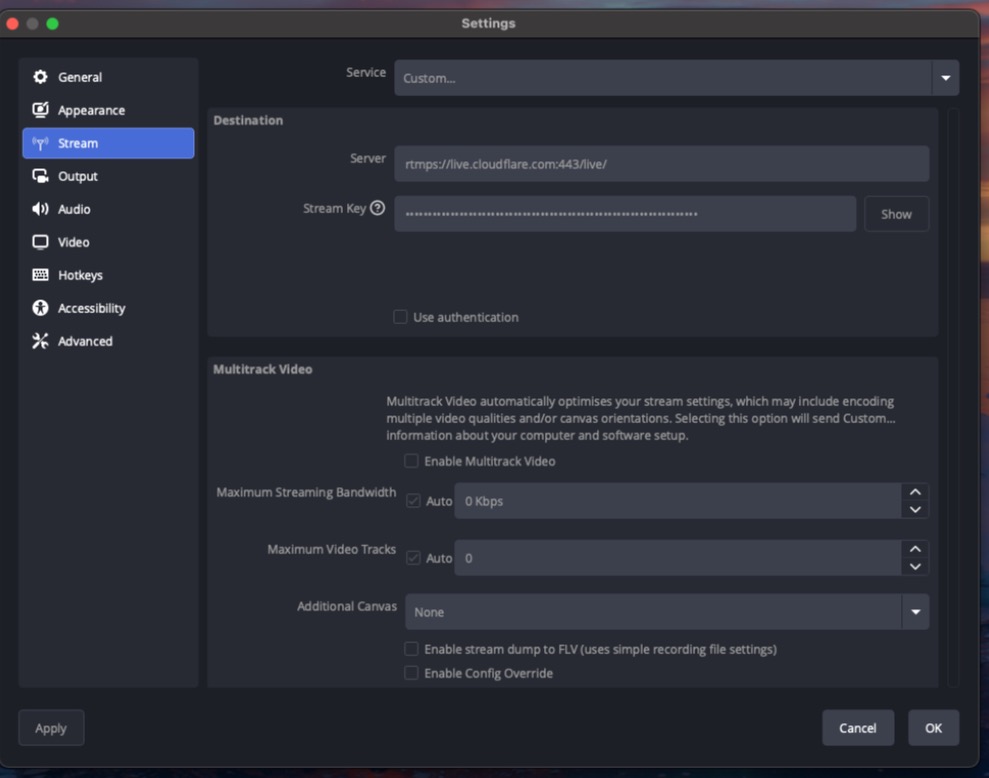
- Open the settings. On a Mac, click OBS → Settings in the menu at the top of your screen (or press Command + comma). On Windows, click File → Settings.
- Click Stream on the left.
- Next to Service, choose Custom…
- In Server, paste the RTMPS URL from ClipAd. It starts with
rtmps://. - In Stream Key, paste the key from ClipAd.
- Leave Use authentication and Enable Multitrack Video turned off.
Step 3: Choose your output settings
These settings decide how good and how stable your stream is. They matter most on a slow network.
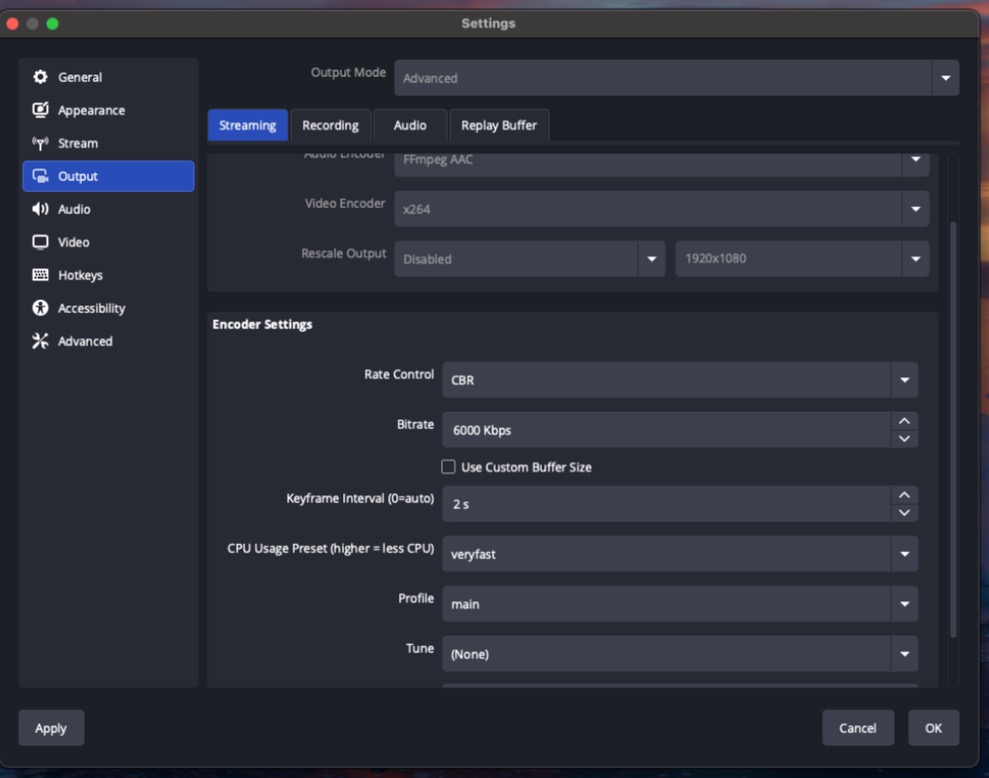
- In Settings, click Output.
- Set Output Mode to Advanced. Then open the Streaming tab.
- Video Encoder: choose x264. It works on every computer. If your computer is slow and OBS says "Encoding overloaded", choose your computer's hardware encoder instead. On a Mac, that is Apple VT H264 Hardware Encoder. Other computers may have NVENC H.264, QuickSync H.264 or AMD HW H.264. It must be an H.264 encoder.
- Audio Encoder: leave it on FFmpeg AAC. ClipAd needs AAC audio.
- Rate Control: choose CBR. This keeps the stream at a steady speed.
- Bitrate: type 6000 if your upload speed is strong. If your connection is slow, use a lower number. A good rule: use no more than 70% of your upload speed. The next article has a table.
- Keyframe Interval: type 2. Do not leave it at 0, which means "auto". If your preview freezes on a slow network, try 4. The allowed range is 2 to 8 seconds.
- Leave CPU Usage Preset, Profile and Tune on their default values.
Step 4: Choose your video size and speed
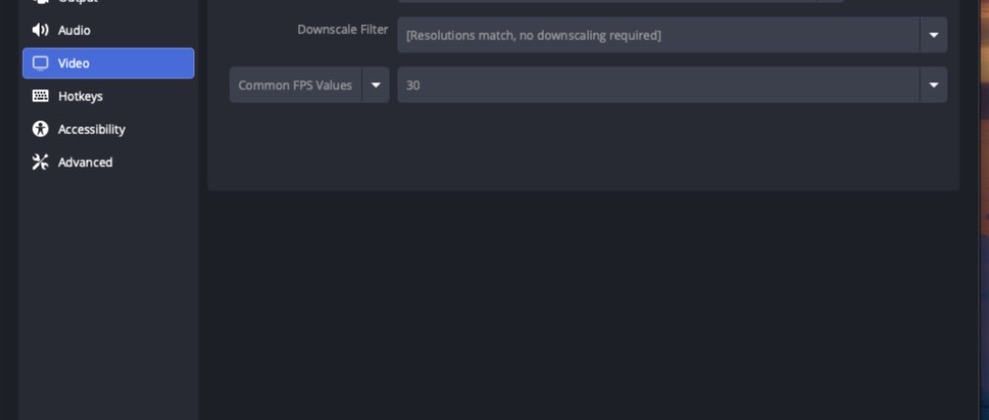
- In Settings, click Video.
- Base (Canvas) Resolution: 1920x1080.
- Output (Scaled) Resolution: 1920x1080 for a strong connection. Use 1280x720 for a slower connection.
- Common FPS Values: 30. This is enough for news, talk shows and interviews.
- Click Apply, then OK.
Step 5: Check your picture and sound
- In the main OBS window, make sure your camera, capture card or video appears in the preview.
- Look at the Audio Mixer. The green bars should move when there is sound.
- On a Mac, if a source is black or silent, open OBS → Review App Permissions in the menu at the top of your screen and allow Screen Recording, Camera and Microphone.
Step 6: Start streaming
- In OBS, click Start Streaming. It is in the Controls panel at the bottom right.
- Go back to the Live tab in ClipAd. Wait up to 30 seconds.
- The page changes from Connect your encoder to You're live. The preview starts playing.
- Click Enter live studio to start clipping.
The signal bars at the top of the page show the health of your stream. Green is healthy. See Best settings and how to fix a poor stream for what each colour means.
When your show ends
- In OBS, click Stop Streaming.
- In ClipAd, click End this session.
ClipAd cannot switch off OBS for you. Always stop OBS first. If your feed is missing for about 30 minutes, ClipAd ends the session by itself. It warns you a few minutes before that.
Next time
OBS remembers your settings. Next time you only need a new Stream Key. Start a new session in ClipAd, paste the new key in Settings → Stream, and click Start Streaming.
Something not working?
See Best settings and how to fix a poor stream. It covers freezing, delay, no sound and "waiting for your encoder".